Step 12 Draw a line from the front vertical line to the right vanishing point. Painting Terracotta Roof Tiles Step 4 Applying Dulux Paint Able Roof Restoration Youtube Terracotta Roof Terracotta Roof Tiles Roof Restoration.

Set Of Seamless Roof Tiles Textures Black And White Graphic Patterns Of Architectural Materials Texture Drawing Texture Sketch Architecture Design Sketch
Plan now the roof form of your house on your own PC with the professional 3D house planner software of cadvilla and save at the same time money by the current special prices.

. Find the Top of the Roof Line As you draw the top of the roofline you start by drawing from the front edge of the roof at the peak and draw a line back to the original vanishing point you used to build the box not pictured in. Use slice plane to make horizontal segments of the roof. Fixing the Roof.
07 30 00 - Steep Slope Roofing. Let us know how it goes and if are looking for more information. Eave Slate Optional - A moulded concrete tile which is mechanically fastened to the eaves of the roof.
Learn how to model a wide variety of roof types and conditions in ARCHICAD in this in-depth tutorial by ARCHICAD master Eric Bobrow. Measure a roof pitch or a roofing slope that will identify the angles of the roof in relation to both vertical and horizontal rises from the structure. Basically you should then use transform perspective and the free transformation tool until it fits the shape of your roofs outlines.
This channel interlocks with a lip formed into tiles next to and above it to create a strong connection. Draw an X criss-cross from all the corners in the front square. After satisfying with the sketch I continue to draw the actual line into to roof windows.
Covers settings placement and editing. How to Tile a Roof. Vertex subobject select the vertexes as shown and move them down.
On the Properties palette select Single slope or Double slope for Shape. Bring the Tile to the front of the rendered Layer displaying it above other nearby Tiles. Next Ive drawn a sketch roof windows on the top of the building with a pink line.
My method might be unconventional but it works thats whats important. Draw in all the various intersections that are a result of the various roof pitches coming together. Draw faint vertical lines up from each of the wall base lines to the height you have determined in the previous step.
First roughly adjust the roof tiles to your roof but dont forget to leave an overhang. Painting Concrete And Ceramic Roof Tiles Www Grupabiotop Pl Roof Paint Outdoor Paint Colors Roof Renovation. Draw a line from the vanishing point used for the inclined plane to the back top corner of the sidewall of the box as demonstrated to the right.
If your tile is 22mm long you will need to allow about 10mm between each pencil line. Later you will draw a darker line which includes the finished material on the outside of the home Draw a faint horizontal line at the level of the upper ceiling joists or subfloor above this level. We have the right software solution for you.
Interlocking roof tiles help with installation. 07 32 29 - Rubber TilesPanels. Typically a roof plan is a simple 2D drawing which shows a birds eye view of your roof.
07 31 16 - Metal Shingles. If the tile is already at the front of the layer this will increment the tiles Z-Index by 1 each time its clicked. The prices range between 2995 21900 incl.
Interlocking roof tiles typically include a channel on one or two sides of the tile. Eave slate serve two purposes 1 they prevent eave damage when leaning a ladder on the eave to access the roof 2 they are the first line of defense in reducing the occurrence of up-lift in high wind conditions as uplift tends to start at the eaves. 07 33 00 -.
- make a tile or get one from the internet - select the tile fuzzy select and copy the tile Edit Copy It is now a brush - make a new image File New - with the Path Tool draw some parallel lines from left to right up down on the same path layer - with the roof tile brush. And are drawn to the same scale as an accompanying floor plan. Annotations can be made to further explain specific aspects such as ridges and slopes as well as the roof pitch.
Slate clay interlocking etc and then you select the vector you want and it covers that line with the roof tiles and roofing batten in section. In the drawing area specify points for the corners of the roof. Extrude selected polygon to give the thickness of roof tiles.
Use a good quality PVA adhesive to fix the tiles into position. Step 10 Draw an x to all the corners in the back square. 07 31 00 - Shingles and Shakes.
I came across this interesting blog post which has a step by step technique to design this roof. One of the most popular ARCHICAD tutorial videos on YouTube with 183179 views and 458 thumbs up. Open the tool palette that contains the roof tool you want to use and select the tool.
This is for making more segments on roof to create waves on the tiles in next step. Alfredo_Medina is one of the best for adaptive design. After finished draw roof tile Ive hidden the roof tile guideline and begin moving to the next part.
Stroke path values in the Paintbrush dock - see image below. To help keep your rows level draw a pencil line across the roof where your first row of tiles will lay. The primary function of roofing underlay is to provide an additional layer of.
Laying your roof battens correctly is another crucial step when tiling a roof. Created in ArchiCAD 15 however these methods apply to ALL later versions. 07 30 91 - Canvas Roofing.
Make a note concerning the run-off that will occur with these slopes and ravines. 07 32 19 - Metal Roof Tiles. Drawing express has a roof tiles command in which you select the tile ie.
Now we have wave on tiles. Roof Tiles Sealant Roof Tiles Clay Roof Tiles Roof Repair. Fitting the Under-tile Membrane.
Send the Tile to the back of the Tiles Layer displaying it below other nearby Tiles. Then continue to draw lines right the way up the roof remembering to allow each row of tiles to overlap by approx. Select and connect edges again see below.
Step 11 Draw a vertical line thru the center of the x and draw the front one as high as you want the roof to be.
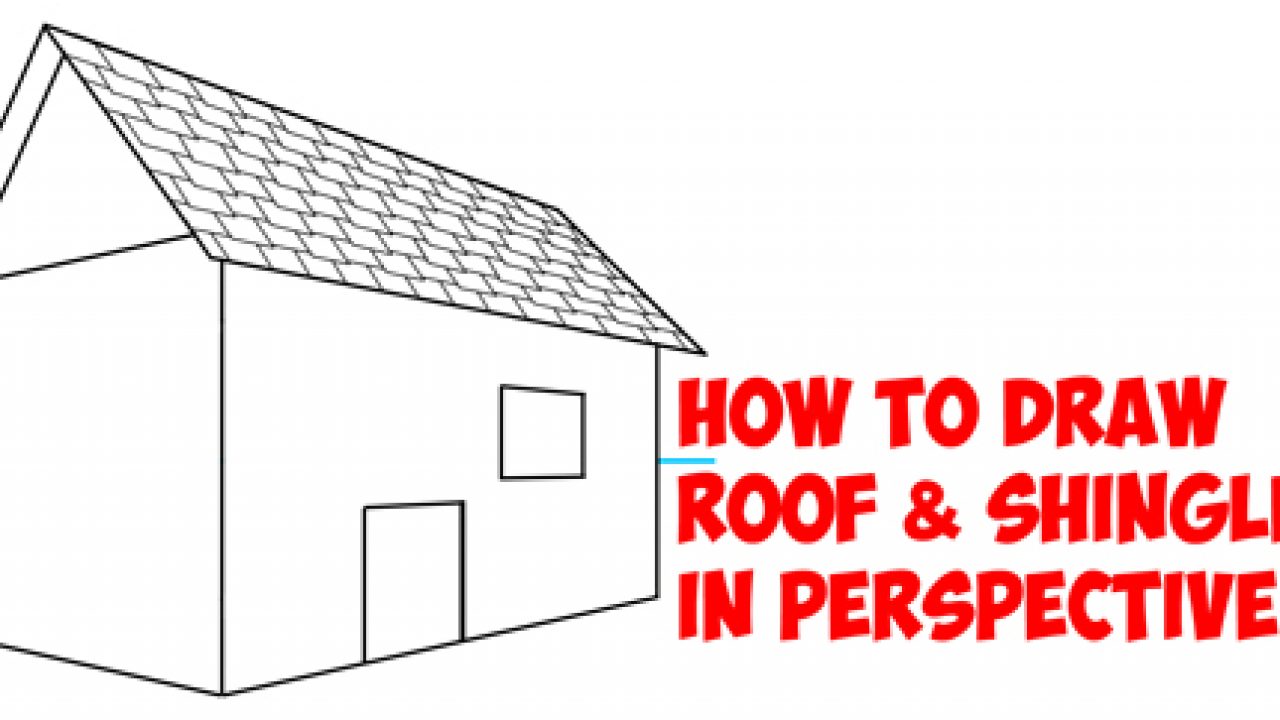
How To Draw A Roof And Shingles With Two Point Perspective Easy Step By Step Drawing Tutorial How To Draw Step By Step Drawing Tutorials

How To Draw A Roof With Shingles In Two Point Perspective Easy Step By Step Drawing Tutorial Youtube
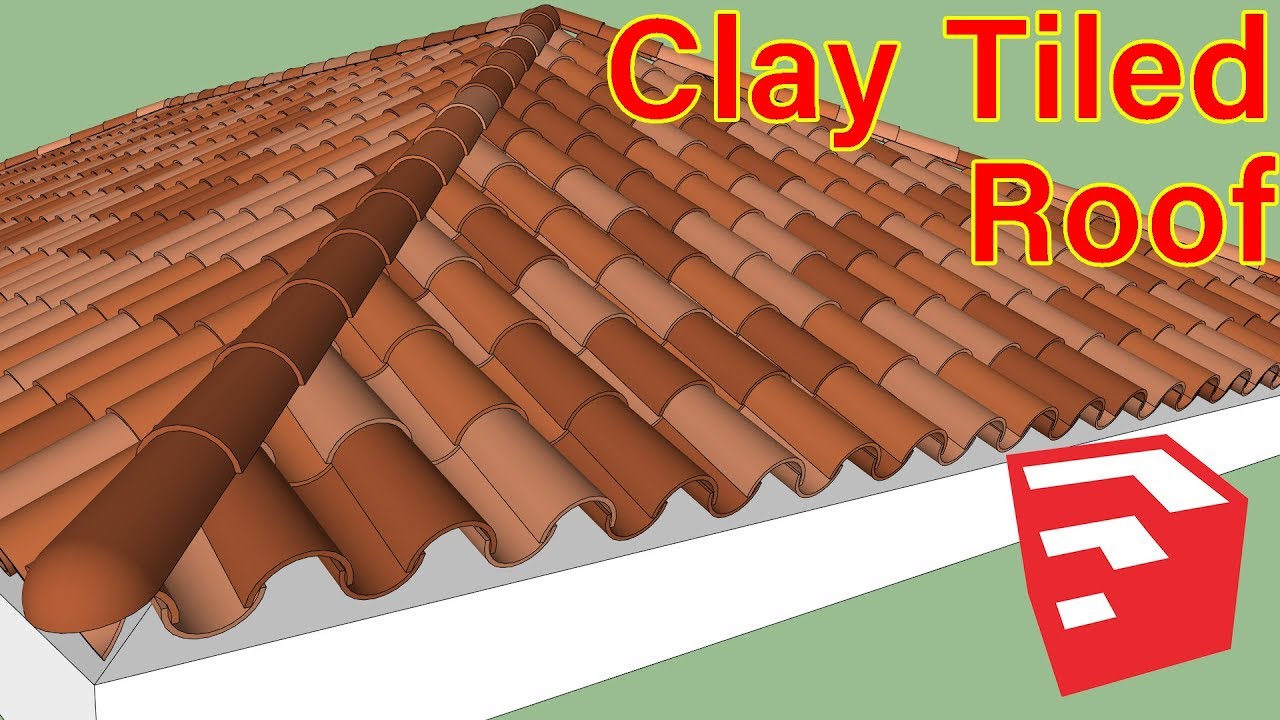
How To Make Clay Tiled Roof In Sketchup Youtube
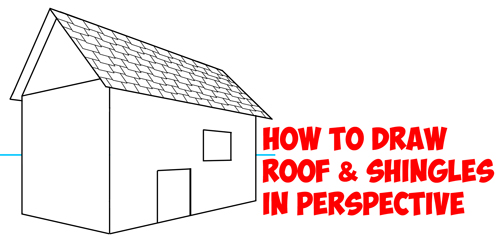
How To Draw A Roof And Shingles With Two Point Perspective Easy Step By Step Drawing Tutorial How To Draw Step By Step Drawing Tutorials
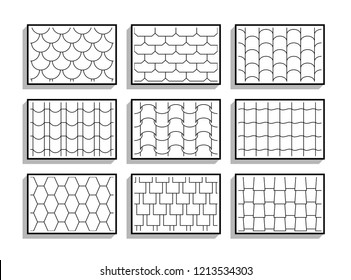
Set Seamless Roof Tiles Textures Black Stock Vector Royalty Free 1213534303

Natural Tiles On The Roof Texture Draw Classic Style Stock Photo Picture And Royalty Free Image Image 121642886

Set Of Seamless Roof Tiles Textures Black And White Graphic Patterns Of Architectural Materialstiles Texture Drawing Texture Sketch Architecture Design Sketch
Shingles Porch Roof Design Texture Drawing Shingling
0 comments
Post a Comment